Configuring The Linksys Router
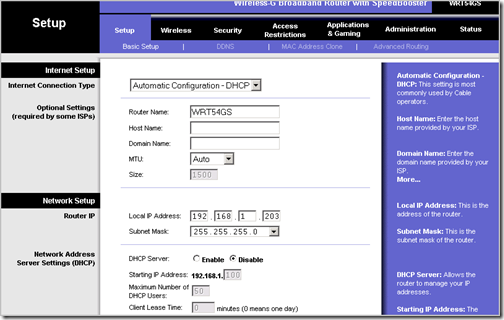
login to your Linksys router and on the Setup tab make sure you set the following configurations:
- Internet Connection type : Automatic Configuration – DHCP
- Router Name: anything
- Host Name : anything
- Domain Name : anything
- MTU : Auto
- Local IP Address: Enter an IP address from your network here
- DHCP Server : Disable
Click on Save Settings after making the changes.
note. your settings could be different, but just make sure you enter a local network IP address for local IP, and disable DHCP server. otherwise your router won’t work.. also don’t forget to plug-in the Ethernet cable on the router on one of the LAN ports, not the WAN port, otherwise you won’t be able to connect using the new IP address.
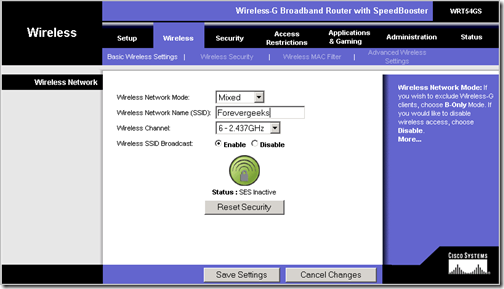
now, click on the Wireless tab, and set the following settings:
- Wireless Network Mode : Mixed
Wireless Network Name (SSID): type your chosen SSID here
Wireless Channel: Leave the default if you want, otherwise change it to something else.
Wireless SSID Broadcast : Enable Click on the Save Settings after making the changes.
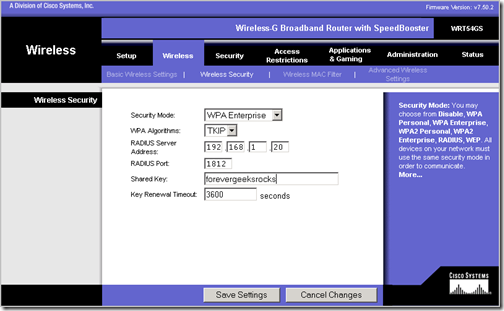
Now click on the Wireless Security option. and make sure you have the following settings:
- Security Mode : WPA Enterprise
- WPA Algorithms : TKIP
- RADIUS Server Address: enter the IP address of your radius server here
- RADIUS Port: Leave the 1812 port there
- Shared-key : enter your shared key here.
- Key Renewal Timeout: leave the default value (3600 seconds)
click on the Save Settings button after you finish changing the settings.
Configuring The Radius Server
now, that we have setup the Linksys router, we need to configure the Internet Authentication service to talk back to the Linksys router.
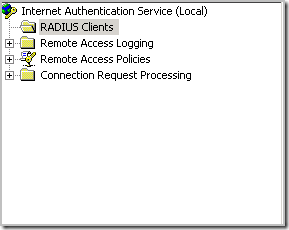
On your Windows Server, go to Administrative Tools and open the Internet Authentication Service and select the Radius Clients folder on the left panel:
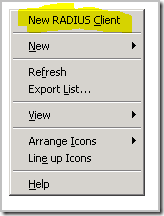
then right-click on an empty area on the right panel, and select New Radius Client:
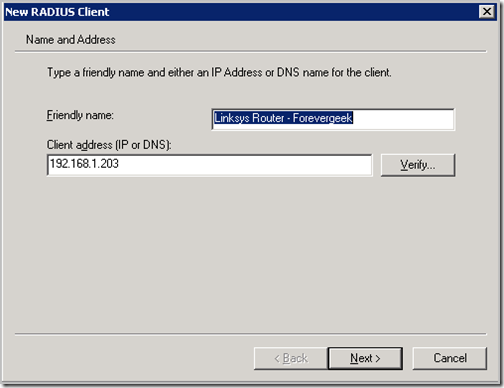
as Friendly name type something easy to identify for you, and for Client Address ( IP DNS ) type the IP address of the Linksys router.
click on Next.
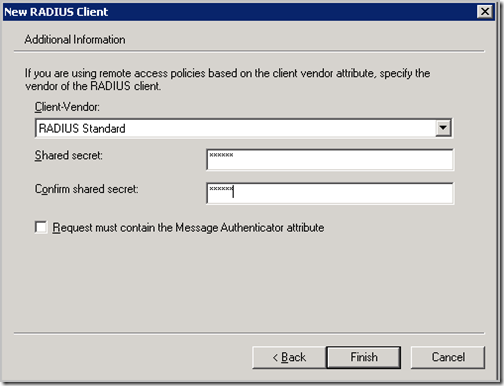
on the next screen, select Radius Standard on the Client-Vendor option. enter the Shared secret key. this key is the shared key we entered on the Linksys router wireless security window . make sure the option Request must contain the message authentication attribute is unchecked.
click on the Finish button after you have entered all the settings.
that’s it, that should take care of the radius server and the router communication. on the next post we will setup the group policy to authenticate our domain users.

5 comments:
Very helpful Post. Your article could be considered as complete online support for successfully setting up linksys router. Nice work!
This is awesome working good, and the process is very easy to work on Remove babylon
I am very enjoyed for this blog. Its an informative topic.
linksys router login
This post is awesome, really great work on Setup Linksys Router
The default web address linksyssmartwifi helps users access the network settings so the Linksys device can be set up hassle free. The web address can also be used as an alternative to the default IP address which most users use to access the login page. For more information on the Linksys Smart WiFi Login page access, login to our website.
Post a Comment