How to hack iphone which is PIN LOCKED

Wednesday, December 16, 2009 by BBTUNA

So if you are a fan of the iPhone and have it all configured & syncd to your Exchange server, I want to pass a word of caution to you.

Firstly, you SHOULD be locking your iPhone with a PIN. Not doing so makes it easy for anyone to look at your emails, contacts and calendar. It’s another layer of defense which costs you nothing. Please use it.

However, I am sad to report that even if you do use it, the current PIN security in iPhone 2.0.2 is flawed. If you have used the “Favorites” feature in the phone, it is possible to break into the phone. :(

Here are the steps to do so:

  1. Press the Home button to wake up the iPhone.
  2. Slide to unlock
  3. Click the “Emergency Call” button on the bottom left
  4. Press the “Home” button two times fast. Your Favorites list will show up.
  5. Click on the “>” circle of a contact that has an email address tied to it
  6. Hit the email address to create a new email.
  7. “Cancel” the new email.
  8. You are now in the users Exchange mailbox, without knowing their PIN to unlock the phone.

This seems like a pretty interesting attack vector. I would have never expected the Emergency mode in an iPhone to be used so easily in this way.

Apple is aware of the security hole, and this will be circling around the Internet shortly. So keep those iPhones close until an update is available!!

Posted in | 0 Comments »

How to lock your computer with a USB drive

Tuesday, December 15, 2009 by BBTUNA

Tired of people starting your computer when you are not around and messing up custom settings? Wouldn’t it be cool if you could lock your computer by just removing your USB stick from it? I’ll show you how you can use your USB stick, Flash Drive or Pen Drive what ever you call it to lock your computer, among other things…

Boot Lock
This trick will allow you to use your USB to BOOT into Windows. If someone tries to start the computer without your USB stick, it will display boot errors. Before begin, you playing with the BIOS and boot files of your computer may result in you not being able to boot into your Windows partition; so continue at your own risk! Things you need: A 64MB or larger sized USB Stick, Windows Recovery Disk (just in case).

Unhide hidden and protected files : Go to Tools > Options > View, check Show hidden files and un-check Hide protected system files.

  • From the drive where Windows is installed (normally C:\), copy the files boot.ini, ntdlr and NTDETECT.COM to your USB Stick.
  • Now, we need to go into your BIOS, so restart the computer and keep jabbing [F8] as soon as the computer starts.
  • Once in the BIOS, enable USB Drive as the first boot device. You might have to enable USB Legacy Support on older BIOSes.
  • Restart your computer, if all goes well, you should be able to log into Windows. If not, then unplug the USB Stick, return to the BIOS and change the First Boot device to your hard disk drive and repeat the steps above.
  • Once you are logged into Windows, go to your Windows drive and rename boot.ini to boot.bak.
  • To check if you have setup everything correctly, eject your USB stick and reboot the computer. You should get error messages on the screen such as Invalid Boot.ini” or “Windows could not start”.
Posted in | 0 Comments »

Passing arguments to the shell

by BBTUNA

Shell scripts can act like standard UNIX commands and take arguments from the command line.

Arguments are passed from the command line into a shell program using the positional parameters $1 through to $9. Each parameter corresponds to the position of the argument on the command line.

The positional parameter $0 refers to the command name or name of the executable file containing the shell script.

Only nine command line arguments can be accessed, but you can access more than nine using the shift command.

All the positional parameters can be referred to using the special parameter $*. This is useful when passing filenames as arguments. For example:

   cat printps    # This script converts ASCII files to PostScript    # and sends them to the PostScript printer ps1    # It uses a local utility "a2ps"    a2ps $* | lpr -Pps1    printps elm.txt vi.ref msg 

This processes the three files given as arguments to the command printps.

Posted in | 0 Comments »

Executing a shell script

by BBTUNA

Before using a file as a shell script you must change its access permissions so that you have execute permission on the file, otherwise the error message Permission deniedis displayed.

To run the shell script, simply type its name at the prompt. The commands in the script will then execute one at a time as though you were typing them in at the terminal.

To give yourself execute permission for the file containing the script use the command:

   chmod u+rwx filename 

The +rwx after the u allows you to read, write to and execute the script: no one else has permission to read, write or execute.

To give other users permission to read and execute but not alter the shell script use:

   chmod go+rx filename 
Posted in | 0 Comments »

How to tether the BlackBerry Bold

by BBTUNA

After wanting to do this for a long time, I finally was able to get my Blackberry 8800 to work as a USB modem for my laptop. This means you can get internet on your laptop/desktop wherever you get ATT/Cingular Service. I got it to work on Vista, but the instructions below are for XP. Vista basically has the exact same setup instructions though. It was confusing at first, but below I wrote out instructions that even a CHILD could follow.

You need the following before we begin:

  • Blackberry 8800 (Most likely will work with any ATT/Cingular phone)
  • AT&T Wireless Service with unlimited data plan (unless you like paying fees)
  • USB connector cable

Okay, you’re ready to begin:

  1. If you have not already, download and install the Blackberry Desktop Software.
  2. Go to the Windows Device manager. Quickest way: Start > Run > devmgmt.msc
  3. Click + button next to Modems, double click “Standard Modem”
  4. Click the Advanced tab
  5. Enter this into the empty box (no leading space): AT+CGDCONT=1,”IP”,”wap.cingular”
  6. Hit Okay, and close device manager.
  7. Go to network connections. Quickest way: Start > Run >
    Paste in the following line and hit enter:
    explorer.exe ::{7007ACC7-3202-11D1-AAD2-00805FC1270E}
  8. Click Create a new connection on the left, and follow these steps:
    1. Welcome to … Wizard –> Next
    2. [Select] Connect to internet –> Next
    3. [Select] Set up my connection manually –> Next
    4. [Select] Connect using a dial-up modem
    5. Type in a connection name of your choice (example: ATT dialup) –> Next
    6. Enter this as the phone number: *99***1# –> Next
    7. Enter user name (ALL CAPS): ISP@CINGULARGPRS.COM
    8. Enter and confirm password (ALL CAPS): CINGULAR1 –> Next/Finish
  9. Open the desktop manager and plug in your Blackberry via the USB cable. Make sure it detects the Blackberry as connected.
  10. Go back to your network connections window (step 7), and double click the new ATT Dialup icon.
  11. Your password, username, and dialup number should already be saved. Just click “Dial”

This worked for me on the first try. It will not incur extra charges to your Blackberry plan on AT&T as long as you have the unlimited data plan.

Posted in | 0 Comments »

Upside-Down-Ternet

by BBTUNA

If your neighbors are stealing your wireless internet access. You could encrypt it or alternately you could have fun. This will help battle wireless leeches out there. First, I'm doing all this in Linux (BackTrack 4).

Split the network

I'm starting here by splitting the network into two parts, the trusted half and the untrusted half. The trusted half has one netblock, the untrusted a different netblock. We use the DHCP server to identify mac addresses to give out the relevant addresses.

/etc/dhcpd.conf

ddns-updates off; ddns-update-style interim; authoritative;  shared-network local {          subnet *.*.*.* netmask 255.255.255.0 {                 range *.*.*.* *.*.*.*;                 option routers *.*.*.*;                 option subnet-mask 255.255.255.0;                 option domain-name "XXXXX";                 option domain-name-servers *.*.*.*;                 deny unknown-clients;                  host trusted1 {                         hardware ethernet *:*:*:*:*:*;                         fixed-address *.*.*.*;                 }   }          subnet 192.168.0.0 netmask 255.255.255.0 {                 range 192.168.0.2 192.168.0.10;                 option routers 192.168.0.1;                 option subnet-mask 255.255.255.0;                 option domain-name-servers 192.168.0.1;                 allow unknown-clients;          } }  

IPtables is Fun!

Suddenly everything is kittens! It's kitten net.

/sbin/iptables -A PREROUTING -s 192.168.0.0/255.255.255.0 -p tcp -j DNAT --to-destination 64.111.96.38 

For the uninitiated, this redirects all traffic to kittenwar.

For more fun, we set iptables to forward everything to a transparent squid proxy running on port 80 on the machine.

/sbin/iptables -A PREROUTING -s 192.168.0.0/255.255.255.0 -p tcp -m tcp --dport 80 -j DNAT --to-destination 192.168.0.1 

That machine runs squid with a trivial redirector that downloads images, uses mogrify to turn them upside down and serves them out of it's local webserver.

The redirection script

#!/usr/bin/perl $|=1; $count = 0; $pid = $$; while (<>) {         chomp $_;         if ($_ =~ /(.*\.jpg)/i) {                 $url = $1;                 system("/usr/bin/wget", "-q", "-O","/space/WebPages/images/$pid-$count.jpg", "$url");                 system("/usr/bin/mogrify", "-flip","/space/WebPages/images/$pid-$count.jpg");                 print "http://127.0.0.1/images/$pid-$count.jpg\n";         }         elsif ($_ =~ /(.*\.gif)/i) {                 $url = $1;                 system("/usr/bin/wget", "-q", "-O","/space/WebPages/images/$pid-$count.gif", "$url");                 system("/usr/bin/mogrify", "-flip","/space/WebPages/images/$pid-$count.gif");                 print "http://127.0.0.1/images/$pid-$count.gif\n";          }         else {                 print "$_\n";;         }         $count++; } 

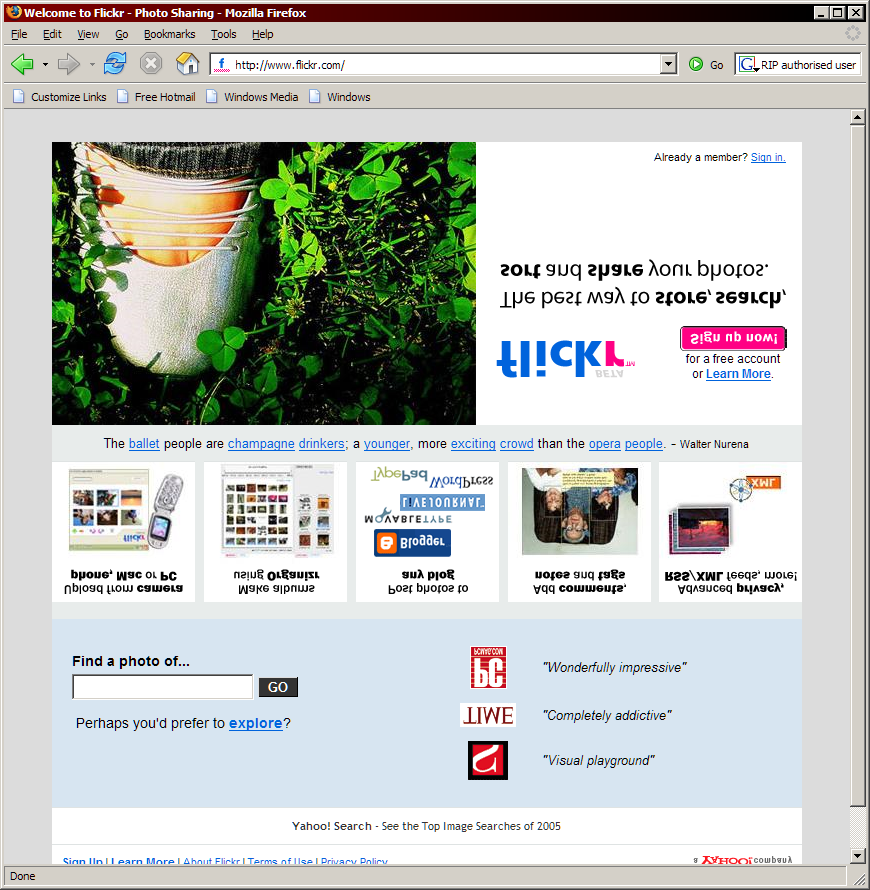
Then the internet looks like this!

Posted in | 0 Comments »

How to Crack the Account Password on Any Operating System

by BBTUNA

Windows
Windows is still the most popular operating system, and the method used to discover the login password is the easiest. The program used is called Ophcrack, and it is free. Ophcrack is based on Slackware, and uses rainbow tables to solve passwords up to 14 characters in length. The time required to solve a password? Generally 10 seconds. The expertise needed? None.

ophcrackSimply download the Ophcrack ISO and burn it to a CD (or load it onto a USB drive via UNetbootin). Insert the CD into a machine you would like to gain access to, then press and hold the power button until the computer shuts down. Turn the computer back on and enter BIOS at startup. Change the boot sequence to CD before HDD, then save and exit.

The computer will restart and Ophcrack will be loaded. Sit back and watch as it does all the work for your. Write down the password it gives you, remove the disc, restart the computer, and log in as if it were you own machine.

Mac
The second most popular operating system, OS X is no safer when it comes to password cracking then Windows.

The easiest method would be to use Ophcrack on this, also, as it works with Mac and Linux in addition to Windows. However, there are other methods that can be used, as demonstrated below.

If the Mac runs OS X 10.4, then you only need the installation CD. Insert it into the computer, reboot. When it starts up, select UTILITIES > RESET PASSWORD. Choose a new password and then use that to log in.

If the Mac runs OS X 10.5, restart the computer and press COMMAND + S. When at the prompt, type:

fsck -fy

mount -uw /

launchctl load /System/Library/LaunchDaemons/com.apple.DirectoryServices.plist

dscl . -passwd /Users/UserName newpassword

That’s it. Now that the password is reset, you can login.

Linux
Finally, there is Linux, an operating system quickly gaining popularity in mainstream, but not so common you’re likely to come across it. Though Mac and Linux are both based on Unix, it is easier to change the password in Linux than it is OS X.

To change the password, turn on the computer and press the ESC key when GRUB appears. Scroll down and highlight ‘Recovery Mode’ and press the ‘B’ key; this will cause you to enter ‘Single User Mode’.

You’re now at the prompt, and logged in as ‘root’ by default. Type ‘passwd’ and then choose a new password. This will change the root password to whatever you enter. If you’re interested in only gaining access to a single account on the system, however, then type ‘passwd username’ replacing ‘username’ with the login name for the account you would like to alter the password for.

Conclusion
There you have it – that is how simple it is for someone to hack your password. It requires no technical skills, no laborious tasks, only simple words or programs. The moral of the story? Encrypt your data to keep it safe.

Posted in | 0 Comments »

Poisioning

Tuesday, December 1, 2009 by BBTUNA

One of the myths surrounding a switched environment is that it prevents packet sniffing. Well it really doesn’t. Anyone can put there network card into promiscuous mode and grabbing packets off the wire, and if you really need to sniff the traffic it is still entirely possible using Arp Spoofing. All you really need is a tool such as Ettercap.

Firstly, lets cover a few basics.

What is ARP?
ARP is the Address Resolution Protocol. It is used to translate IP Addresses to MAC Address (Physical Address). ARP basically works by a computer sending a query out to its broadcast domain asking who has a certain MAC address. When the IP address with that MAC Address receives such a packet it replies with its MAC Address and the requesting computer will log the response in its ARP cache. The ARP cache can be viewed by typing arp –a from the command-line, and an output similar to that below:

Interface: 10.10.7.21 --- 0x5
Internet Address Physical Address Type
10.10.1.12 00-0b-cd-ef-2c-ff dynamic
10.10.1.13 00-0e-7f-ef-b5-8d dynamic

What is ARP Spoofing?
How ARP Spoofing works is by an attacker PC sending out fake ARP responses to victim PC’s stating that they are someone else, the victim PC then updates their ARP cache to direct traffic to the attacker. Upon receiving the traffic the attacker will log, read, or adjust the packets and then forward them onto the destination.


My favourite tool for arp spoofing is the Ettercap which can be used under Windows or Linux. Ettercap provides a GUI which can be lauched from the command-line using ettercap –G or it can be run from the command-line entirely. I’ll cover the command-line usage as the GUI is very intuitive and simple to use. The switches I list below are for my Linux box but windows switches will probably be the same.

Basic Sniffing
To watch traffic passing by on the network use:

ettercap –Tzq –i eth0

This will put ettercap into text mode, it will not arp scan the network and will be quiet. Only interesting traffic will be displayed as it passes and it will listen on interface eth0.

To sniff traffic between 2 hosts the attacker can run the following command from his Linux box:

ettercap -i eth0 –T –M arp /victim_ip_A/ /victim_ip_B/

The –i switch is telling ettercap to use a specific interface, in this case eth0, the –T switch is telling ettercap to use the Text interface and the –M switch is telling ettercap to use the Man-in-Middle-Mode (MITM). The rest is self-explanatory

Multiple hosts can be sniffed say between a gateway and the targets by using a command such as:

ettercap –i eth0 –T –M arp /192.168.1.1 / /192.168.1.10-20/

If traffic to a certain port, in this case Telnet, is to be captured the command would look like:

ettercap –i eth0 –T –M arp /192.168.1.1 / /192.168.1.10-20/23


To sniff traffic between all hosts on the network:

ettercap –T –M arp // //

BEWARE – depending on the size of the network, this may cause dropped packets and performance issues.
There are many other switches available to use, they can be viewed by checking out the man page for Ettercap (man ettercap) or by viewing the help file (ettercap -–help).

Ettercap is capable of:
• sniffing HTTPS
• Collecting passwords for TELNET, FTP, POP, RLOGIN, SSH1, ICQ, SMB, MySQL, HTTP, NNTP, X11, NAPSTER, IRC, RIP, BGP, SOCKS 5, IMAP 4, VNC, LDAP, NFS, SNMP, HALF LIFE, QUAKE 3, MSN, YMSG
• Injecting traffic
• OS fingerprinting

Logging The Output
To log the output of Ettercap you can use the following:

-L This will log both the packet detail (filename.ecp) and the info (filename.eci)

-l This will log only info (filename.eci)

-w Write output to a pcap file (viewable with Wireshark)

The syntax to log the output would be:

ettercap –T –L filename –qM arp /ip_address_A/ /ip_address_B/

Other useful options
-P use plugin (to view plugins use ettercap –TQ press p to view the plugin menu)
-c Compress the output (gzip)

Viewing The Output
The output from Ettercap can be viewed using Etterlog, Wireshark or sent to the screen (toggle screen output on and off using the space bar)

Fun With Ettercap
So we have seen here how Ettercap can be used to perform MITM attacks and capture traffic between 2 hosts. Obviously this traffic can be parsed for juicy info. You could run Dsniff on the same PC and LAN card to run the traffic through that. You could run Driftnet to view any pictures that are passing the interface, or you could use one of the many plugins to send the visited URL’s to your browser, to find promiscuous NICs or to perform many other useful activities.

For more info take a look at the links below:


http://ettercap.sourceforge.net/
http://www.irongeek.com/i.php?page=security/ettercapfilter
http://ettercap.sourceforge.net/forum/viewtopic.php?t=2833&sid=e541f515a1d4ef76b4ba32073a877

Posted in | 0 Comments »

Basic Linux Commands

by BBTUNA

The purpose of this blog entry is to document a few basic Linux commands that i find useful. I'm fairly new to Linux and recording these commands gives me a point of reference and helps me remember them.


It's important to note that in Linux syntax is case sensitive.

I am using Ubuntu so my syntax may differ slightly to yours if you are using another distro. If you want to learn more about any of the commands i list try the following:

man command (e.g man ls)

or

command -h

or

command --help


The sections i have added so far are:

1. Users
2. Navigation
3. Files
4. Networking
5. Hardware
6. System Tools


I will add to this document as i learn more commands.


1. Users

To add a new user called bob:

adduser bob

To switch to a new user called bob:

su bob

To change bobs password:

passwd bob

To switch straight to root:

su

To run a command as root whilst logged in as another use
r:

sudo command

* this assumes you are in the sudo group.

To view which user you are currently logged in as use:

whoami


2. Navigation

To list directories use:

ls

To list all directories including hidden and permissions use:

ls -la

To list all directories in another folder use the following syntax:

ls -la /home/bob/

In the output anything preceded with a . is hidden.


To change directory use:

cd directory_name

Or the path:

cd /etc/directory_name

To move back in the directory structure use:

cd ..

or

cd ../..

To navigate directly to the root / directory:

cd /

To navigate directly to your home directory:

cd #

To print the current directory use:

pwd


3. Files

To view the contents of a file:

cat filename.txt

To delete a file:

rm filename.txt

To delete all files and directories and sub-directories (without prompting)

rm -Rf directory_name

To locate a file:

locate filename.txt

To change the owner of a file use:

chown bob filename.txt

To change the group ownership as well use:

chown bob:users_group filename.txt

To create a directory use:

mkdir mydirectory

To create a file use:

touch myfilename

To move or rename a file use:

mv file1 file2

To copy a file to bobs home directory use:

cp file1 /home/bob/


4. Networking

To obtain a DHCP address (on all interfaces):

dhclient

Or on just one particular interface:

dhclient eth1

To view the interface network properties:

ifconfig

To set the IP address of a interface:

ifconfig eth1 192.168.1.100/24

To change the MAC address of an interface:

ifconfig eth1 hw ether 11:22:33:44:55:66:77:00

To put an interface into promiscuous mode:

ifconfig eth1 promisc

To take an interface out of promiscuous mode:

ifconfig eth1 -promisc

To view the wireless interface settings:

iwconfig

To set the wireless interface to a particular wireless AP:

iwconfig eth1 essid my_wireless_network

To set the wireless interface to managed mode:

iwconfig eth1 mode managed

To set a wireless interface to monitor mode (for sniffing etc..)

iwconfig eth1 mode monitor

To configure WEP encryption on a wireless interface:

iwconfig eth1 enc {enc key}

To configure a wireless interface to use a particular channel:

iwconfig eth1 channel 3

To view the routing table:

route

To view the routing cache:

route -C

To set a static route to a network:

route add -net 172.16.1.1 netmask 255.255.0.0 dev eth1

To set a static route to a host:

route add -host 80.127.23.65 eth1

To delete a route:

route del -host 80.127.23.65 eth1

To add a default gateway of 192.168.1.1:

route add default gw 192.168.1.1


Tracerouting in linux uses UDP packets as oppose to Windows using ICMP.

To traceroute to a target (yahoo in my example) use:

traceroute www.yahoo.com

Another really cool program i found on my system for tracerouting and providing really useful diagnostic info is mtr:

mtr www.yahoo.com

Bear in mind that unlike traceroute mtr use ICMP echo requests.

To list all network connection (external):

netstat -punta

To list network statistics:

netstat -s

To list statistics on an interface:

netstat -i eth1

For a continuous listing on any netstat commands add -c to the command:

netstat -punta -c


To list any IPTables rules:

iptables -L -v

To quickly add a rule to drop ICMP requests:

iptables -A OUTPUT -p icmp -d 0/0 -j DROP

The above command appends (-A) a rule to the output (OUTPUT) chain telling it that ICMP (-p ICMP) from any destination (-d 0/0) should be dropped (-j DROP)

To remove your rule you can use the command:

iptables -F OUTPUT

To flush all rules use:

iptables -F

To remove any currently active rules:

iptables -X

The following rules can be used to rate limit connections to prevent brute-force login to port 21 (for FTP)

iptables -I INPUT -p tcp --dport 21 -i eth1 -m state --state NEW -m recent \

  --set

iptables -I INPUT -p tcp --dport 21 -i eth1 -m state --state NEW -m recent \
--update --seconds 60 --hitcount 4 -j DROP
Using the rule above will drop any more than 3 connection attampts in 60 seconds from the same IP address.


(I will post a blog article on iptables rules)


Or to block icmp you could run or script the following command:

echo 1 > /proc/sys/net/ipv4/icmp_echo_ignore_all

The default is 0, to to revert it back use:

echo 0 > /proc/sys/net/ipv4/icmp_echo_ignore_all

To use a capture network traffic:

ifconfig eth1 promisc
tcpdump -i eth1 -vv


All the above commands assume the interface is eth1. If you are unsure which is your wireless interface run iwconfig and look for the interface with the wireless extensions.


5. Hardware

To list installed hardware (available on ubuntu):

lshw

To list all PCI devices:

lspci

To list all USB devices:

lsusb

To list the loaded modules

lsmod

Another useful trick i have found relating to hardware, is when i attach a new USB HDD and i am unsure of the what it will be called, i attach the device and then immediately look at /var/log/messages for the last entries. This usually gives me what i need. The tail command is useful here.

tail -n 10 /var/log/messages

This will display the last 10 lines of the log file.

To use tail and have it update (-s 2 will update every 2 seconds) as the log updates use the following command:

tail -n 10 -s 2 -f /var/log/messages

Running the dmesg command will also reveal useful information about hardware.


6. System Tools

To view free disk space use:

df -h

To view disk usage on the system use:

du

du can also specify a directory:

du /home/bob/

A useful tool for viewing running processes is top:

top

or for a more interactive version:

htop

You can also use ps to view process information.

To view a list of all running processes:

ps aux

To view a list of processes by a particular user (bob):

ps U bob

To view process in a tree:

ps -eH

To kill a process by it's PID (example of 28556):

kill 28556


Mounting Disks

To view a list of currently mounted file systems view /etc/mtab or use:

mount -L

To mount a disk first create a folder which you will mount it to:

mkdir /media/usb

mount - t ntfs /dev/sdb /media/usb

To unmount a disk:

umount /media/usb
Posted in | 0 Comments »

Listing Exchange ActiveSync users and device information

Thursday, October 29, 2009 by BBTUNA
In How to get a list of Exchange ActiveSync users we list EAS users on Exchange 2007. Some users may have more than 1 device, or perhaps the user simply got a new smartphone and the old device partnership has not been removed.


Output from Get-ActivesyncDeviceStatistics -mailbox foo@somedomain.com:


FirstSyncTime : 12/22/2007 1:34:10 AM
LastPolicyUpdateTime : 12/22/2007 1:34:43 AM
LastSyncAttemptTime : 1/14/2008 7:45:15 AM
LastSuccessSync : 1/14/2008 7:45:15 AM
DeviceType : PocketPC
DeviceID : *******************************
DeviceUserAgent :
DeviceWipeSentTime :
DeviceWipeRequestTime :
DeviceWipeAckTime :
LastPingHeartbeat :
RecoveryPassword : ********
DeviceModel : WIZA100
DeviceIMEI : ************21900
DeviceFriendlyName : Pocket_PC
DeviceOS : Windows CE 5.2.19134
DeviceOSLanguage : English
DevicePhoneNumber : 1650*******
Identity : foo@somedomain.com\AirSync-PocketPC-*******************************

The * characters in the Identity field are for the DeviceID.

Here's a a quick code snippet (it can probably be scrubbed up a little... ) that will list users and all their devices, along with first sync and last successful sync times:

$mbx = get-casmailbox | where {$_.hasactivesyncdevicepartnership -eq $true -and $_.identity -notlike "*CAS_{*"} ; $mbx | foreach {$name = $_.name; $device = get-activesync devicestatistics -mailbox $_.identity; $device | foreach {write-host $mbx.name, $_.devicemodel, $_.devicephonenumber, $_.deviceid, $_.FirstSyncTime, $_.LastSuccessSync} }


Update: 10/2/2008:
Making it more efficient: Filtering on the server-side using -Filter
Well, the above code could be scrubbed up a little. Rather than getting all mailboxes using Get-CASMailbox and filtering them on the client-side using the Where-Objectcmdlet, a more efficient way of doing this is filtering on the server-side using the -Filter parameter, and getting only the mailboxes which have an ActiveSync device partnershp.

Yes, I've just realized HasActiveSyncDevicePartnership is in fact a filterable property, listed under Advanced Filterable Properties in Filterable Properties for the -Filter Parameter in Exchange 2007 SP1.

Here's the updated version:

$mbx = get-casmailbox -Filter {HasActivesyncDevicePartnership -eq $true -and -not DisplayName -like "CAS_{*"}; $mbx | foreach {$name = $_.name; $device = get-activesync devicestatistics -mailbox $_.identity; $device | foreach {write-host $mbx.name, $_.devicemodel, $_.devicephonenumber, $_.deviceid, $_.FirstSyncTime, $_.LastSuccessSync} }

The output looks like this:

Bharat Suneja WIZA100 16501231234 353B7ACF5014C020CE22CBF1DB7FFD92 11/5/2007 7:41:29 AM 12/20/2007 11:00:15 PM
Bharat Suneja WIZA100 16501231234 7E6B67F47DFD370E89BE13280A75EAA5 12/22/2007 1:34:10 AM 1/14/2008 7

$mbx = get-casmailbox -Filter {HasActivesyncDevicePartnership -eq $true -and -not DisplayName -like "CAS_{*"}; $mbx | foreach {$name = $_.name;$identity = $_.identity;$device = get-activesyncdevicestatistics -mailbox $_.identity; $device | foreach {write-host $mbx.name, $_.devicemodel, $_.devicephonenumber, $_.Identity, $_.deviceid, $_.FirstSyncTime, $_.LastSuccessSync} }


Posted in | 2 Comments »

Create a NFS share for VM ISO files with Windows 2003 Server R2

Thursday, October 22, 2009 by BBTUNA

If your ESX servers are not connected to network storage or if you do not have enough available space on your SAN to dedicate a sub folder of a VMFS volume for ISO files, then you can use a NFS network share to centrally store these images. Creating the NFS share can be done with many server operating systems, but did you know that Windows Server 2003 R2 has native NFS?

VMware-land.com has many “how to” VMware Tips for ESX, and the following is the instructions found there for creating a Windows 2003 R2 NFS share:


  1. On the Windows 2003 Server make sure “Microsoft Services for NFS” in installed. If not you need to add it under Add/Remove Programs, Windows
    Components, Other Network File and Print Services
  2. Next go to folder you want to share and right-click on it and select Properties
  3. Click on the NFS Sharing tab and select “Share this Folder”
  4. Enter a Share Name, check “Anonymous Access” and make sure the UID and GID are both -2
  5. In VirtualCenter, select your ESX server and click the “Configuration” tab and then select “Storage”
  6. Click on “Add Storage” and select “Network File System” as the storage type
  7. Enter the Windows Server name, the folder (share) name and a descriptive Datastore Name
  8. Once it finishes the configuration you can now map your VM’s CD-ROM devices to this new VMFS volume

Repeat steps 5 through 8 for each of your ESX servers to make the same ISO files available to all ESX hosts.

These instructions assume that you have already configured the VMkernel port group on a vSwitch for each ESX host. For instructions and information about configuring the VMKernel for NAS/NFS storage check the Storage Chapter of the ESX Server 3 Configuration Guide.

Of course, you can use the NFS share for more than just ISO file storage too. This is a good repository for patches and scripts that need to be used on all hosts. NFS also makes a good target for VM image backups too. Use some imagination and install the free VMware server on your 2003 R2 box and you have a low budget DR platform. Oh yeah, I shouldn’t forget to mention you can even run ESX VMs from NFS!

Posted in | 0 Comments »

Search for VM Snapshots from the Service Console

by BBTUNA

It may not be the fanciest of methods, but probably the quickest way to find VM snapshots is to use the ls command from the ESX Service Console. By piping the output with grep to find files with the snapshot extension, .vmsn, and using the recursive switch you can scan all the VMFS LUNs visible to an ESX host. That’s so simple it hurts!

To use the ls command to find snapshots do the following:


  1. Log in to the service console (use putty or mRemote for remote log in)
  2. Query for the snap shot files in the VMFS volumes

#ls -Ral /vmfs/volumes/* |grep .vmsn

Posted in | 0 Comments »

Script for VMware HA Feature without VirtualCenter

by BBTUNA

So, who wants free VMware High Availability? That’s the title of a post created by Leo Raikhman on his Leo’s Ramblings blog. In this post, Leo has published the steps and scripting necessary to simulate VMware’s VI3 High Availability (HA) feature. Leo’s script works without VirtualCenter (VC), so VMware customer’s who have not implemented VC can manually create “HA -like” awareness between 2 ESX hosts. If one of the ESX servers goes offline then the virtual machines (VMs) are auto restarted on the other host. Of course, the VMs must be created on shared storage for this to work.

Before considering this script as a replacement understand the major differences between VirtualCenter HA and Leo’s HA:

  • Leo’s script only works between 2 ESX hosts while VC HA can be configured with up to 32 ESX hosts as of VI 3.5 (actually using 32 host HA clusters is another topic, but it can be done)
  • Leo’s script needs the ESX Service Console as written. It would need to be ported for the RCLI to work with ESXi. VC HA works with both ESX and ESXi
  • VC provides a visual status for the health of your HA cluster via the VI Client
  • VC HA provides HA fail over capacity for more than 1 ESX host at a time

I’ve held this post in my drafts because I wanted to try this configuration myself, but alas, I have never gotten around to it. For those that can benefit from VC -less HA and give this script a test, let me (and Leo) know your results.

Leo’s post says:


“First of all lets talk about the basics of what HA actually does: if your ESX server doesn’t respond to a heartbeat for 14 seconds, the other host registers all machines and starts them up. “

Here’s the process from Leo’s Ramblings with the scripts, commands and instructions:

Create a list of the VMs on each host and copy to the other host

But there’s a few other tricks. How do you generate that other_host file? Here’s how. On each host run the following command:

vmware-cmd -l | sed ’s/\ /\\ /g’ > /root/other_host

What you’ve done is just dumped all registered machines on each host to the /root directory.

Now, scp each /root/other_host file to the other ESX server’s /etc directory.

In each /etc/other_host file, re-organize the VM order if you want them to start up differently and delete VMs that you don’t want to start up.

Create the HA script and make it executable

#!/bin/bash
if ! ping -c 14 10.8.0.1 > /dev/null; then
for $i in `cat /etc/other_host` ; do vmware-cmd -s register $i && vmware-cmd $i start ; done
fi
sleep 16
if ! ping -c 14 10.8.0.1 > /dev/null; then
for $i in `cat /etc/other_host` ; do vmware-cmd -s register $i && vmware-cmd $i start ; done
fi

Then I made it executable:

chmod a+x /usr/bin/esx_ha.sh

Here’s what the script does:

If for 14 pings, an ESX server with Service Console IP 10.8.0.1 does not reply, then, browse the contents of the file /etc/other_host, register every listed machine there on the current host (10.8.0.2) an start them up, one by one. Then it sleeps for 16 seconds, and executes the same thing again.

Seems easy enough.

Create a cron entry to start auto HA

Now we need to create a cron entry as root by running crontab -e as the root user. The screen that opens works like vi, input the following text:

MAILTO=”youremail@yourcomapny.com
* * * * * /usr/bin/esx_ha.sh

This means, that on the minute, every minute of the day, the script (which runs twice a minute) will execute and provide HA for you.

Posted in | 0 Comments »

Get a MAC address remotely

by BBTUNA
Ever been in a situation where you need to get a MAC address but don't really feel like logging into the server, wait for it to present your profile, and then open up a command prompt and finally type "ipconfig /all". Here is a trick I learned on how to do this remotely without all that of course the server and you must be online otherwise the long way it is.

1. Open up a command prompt and type
- getmac /s [servername or IP] /u [domain\username]
2. You will be prompted to enter the password for [domain\username]
3. Once you do that you will be presented with the MAC address/es.
Posted in | 0 Comments »

Regenerate SSL Certificate for ESX 3.5

Tuesday, October 20, 2009 by BBTUNA
Ever had to rename a ESX 3.5 host? You've done all the proper procedures of renaming network, hosts files, and changing your rc.conf file but now your storage doesn't recognize your new host. You've checked everything and then we you go to sign in you find out that your ssl certificate still has the old name and won't connect with the SAN array. I've recently run into that problem and here is how I fixed it.

1. Backup your ssl file to be safe.
- cp -r /etc/vmware/ssl /etc/vmware/ssl.bckp
2. After checking that the backup was indeed created, delete the rui.* files
- cd /etc/vmware/ssl
- rm rui.crt
- rm rui.key
3. Now restart hostd and ESX will regenerate the SSL cert and key using your new name.
- service mgmt-vmware restart
4. Easiest way to test if it worked is to use IE and go to https://"yourhost" and view the certificate. You should now see the new name in your issued to and issued by section of the cert.

Thats it. Any comments or question please post. Thanks.
Posted in | 0 Comments »

Failed to install the VirtualCenter Agent Service

by BBTUNA

A number of customers have been reporting the message: “Failed to install the VirtualCenter Agent Service“, when trying to connect an ESX host to virtual center, often after upgrading to ESX 3.0.2 and VC 2.0.2. In all the cases I have come across these reason seems to be that /tmp/vmware-root does not exist. This directory has to exist for the agent install process. To remedy this you can-

  1. Login to ESX Server via ssh client as root user
  2. cd /tmp
  3. mkdir vmware-root
  4. Try re-connecting the host to Virtual Center

Apparently there is a cron job that is removing this directory whenever it runs.Here is another method:

  1. Disable HA. Otherwise, the virtual machines might be forcibly powered down by step 2.
  2. At the service console, issue
    service mgmt-vmware restart
  3. At the service console, issue
    service vmware-vpxa restart
  4. Reconnect the virtual machines to VirtualCenter.
  5. Attempt to re-enable HA within VirtualCenter. If this doesn’t work, this means that vpxa did not install properly.
  6. At the service console, issue
    rpm -qa | grep vpxa
  7. At the service console, issue “rpm -e” on the rpm file that displayed in the previous command.
    rpm -e
  8. Reconnect the virtual machines in the usual manner within VirtualCenter.
  9. Re-enable HA.
Posted in | 0 Comments »

About Me